This tutorial will show you how to make a simple drawstring backpack. I’ve adapted it from Sam DeRose’s great tutorial in Make: Sew a Durable Drawstring Bag.
This particular drawstring backpack features French seams and grommets for extra durability.
Drawstring backpacks are great for taking stuff to work, hiking, shopping, carrying cleats to games, etc., etc.
Important notes
- The finished bag is 16 inches tall and 13.5 inches wide.
- We’ll be using French seams with a 3/4 inch seam allowance (first seam 1/4 inch, second seam 1/2 inch).
- The drawstring casing is 1 inch tall.
- We’ll add grommets and some reinforcement to make the bag durable.
- Before you begin, make sure your fabric has been washed, dried, and ironed. This will prevent unwanted shrinkage should you throw your bag in the wash.
Okay, let’s get started!
Get your stuff
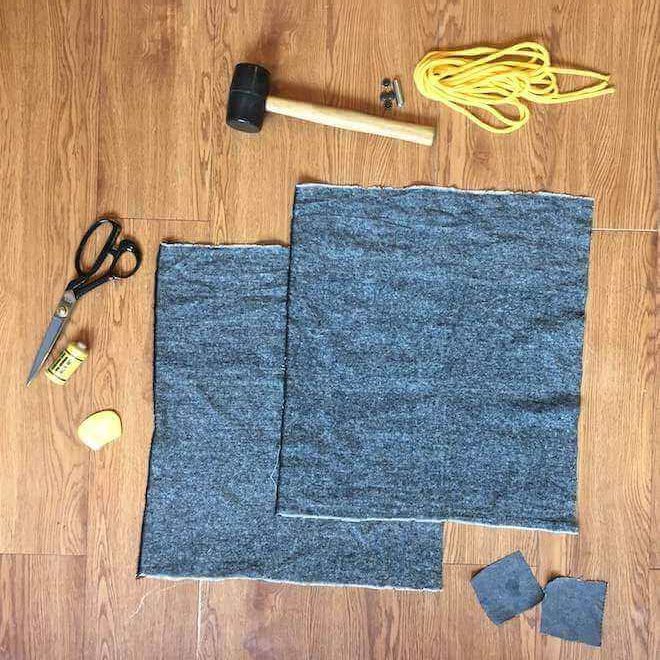
Materials
- Thread
- 2 x grommets (I used 6 mm grommets)
- 2 x rectangles of fabric (18 x 16 inches)
- 2 x cord (90 inches each)
- 2 x pieces of scrap fabric, cut into squares (approx 4 x 3.5 inches)
Tools
- Sewing machine
- Iron
- Fabric shears
- Hammer
- Grommet kit
- Safety pin
- Scissors
- Tailors chalk (or a contrasting pencil crayon will do)
- Ruler
- Measuring tape
How to make a DIY drawstring backpack
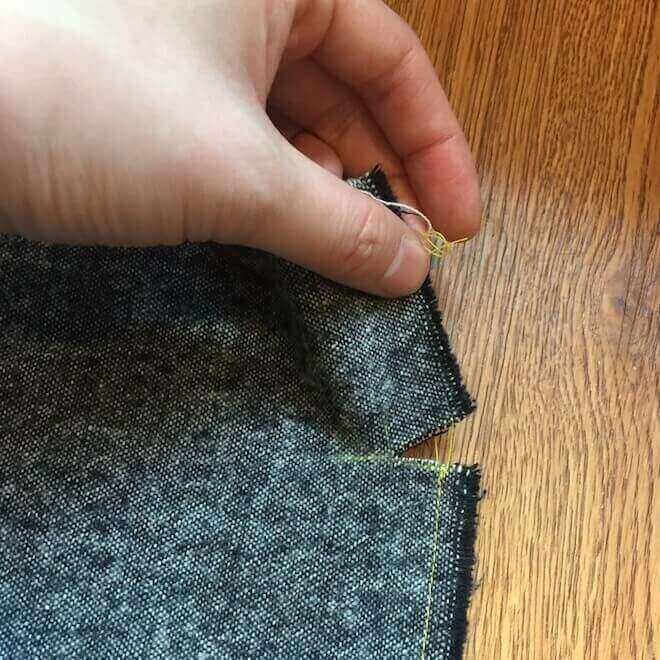
Prepare the fabric for sewing
First we will snip the fabric to separate the drawstring casing from the body of the bag.
Mark two 3/4 inch–long lines 2.5 inches down from the short edge of the rectangle.

Snip along the 3/4-inch lines. Above this snip is the drawstring casing. Below this snip is the body of the bag. Repeat this step to the other rectangle.

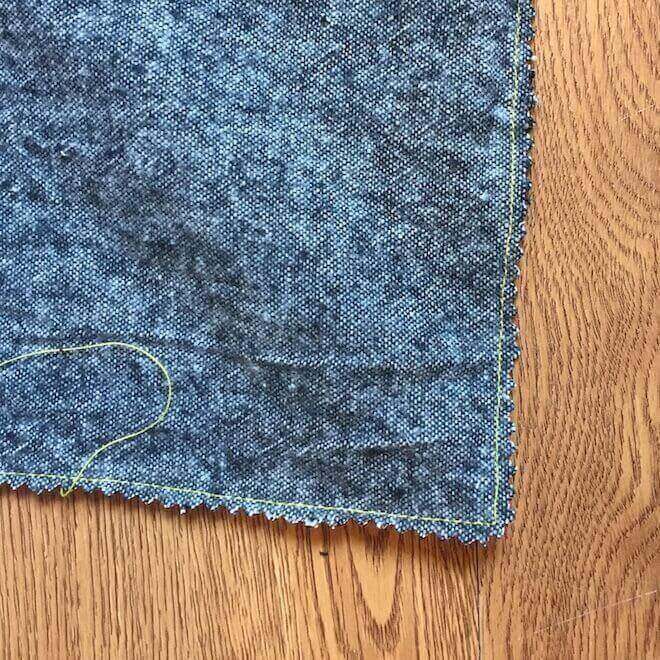
Sew the body of the bag
Arrange your pieces of fabric on top of each other with the right sides facing out.
With a 1/4 inch seam allowance, sew from snip to snip along the side, bottom, and other side of the bag. At the corners, don’t forget to put down your needle and lift up the presser foot so you can pivot the fabric!
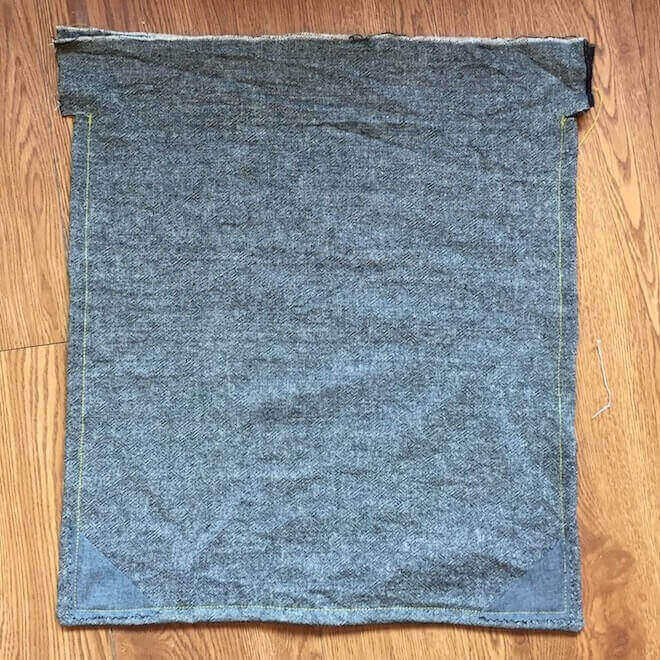
Next, trim the seam allowance from snip to snip.
Turn your bag inside out, making sure to push out the corners. Now the wrong sides are facing outward.
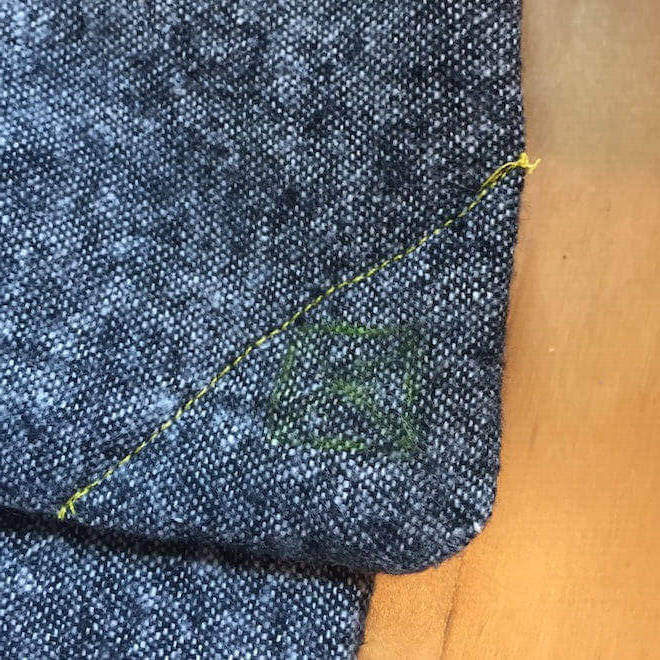
Now you’ll need your two squares of scrap fabric. Fold each square once so it becomes a triangle.
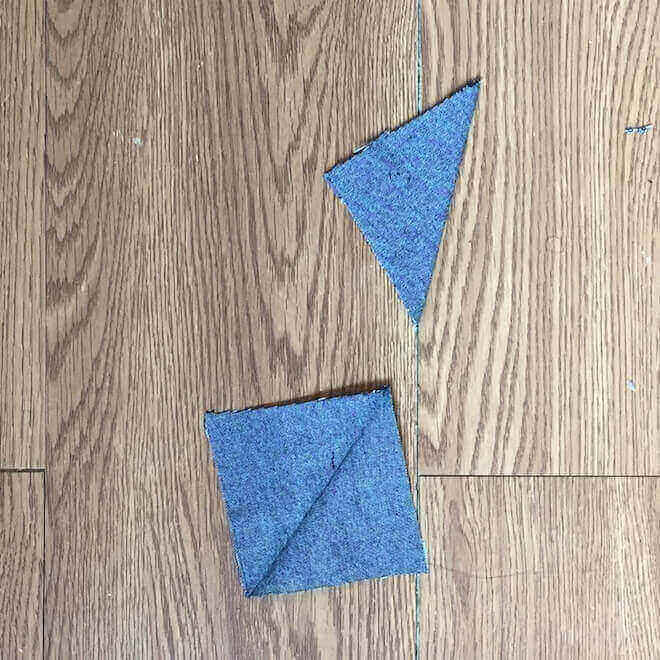
With the wrong side of the bag facing you, place and pin the triangles at the bottom corners. These triangles will act as reinforcements for the grommets.
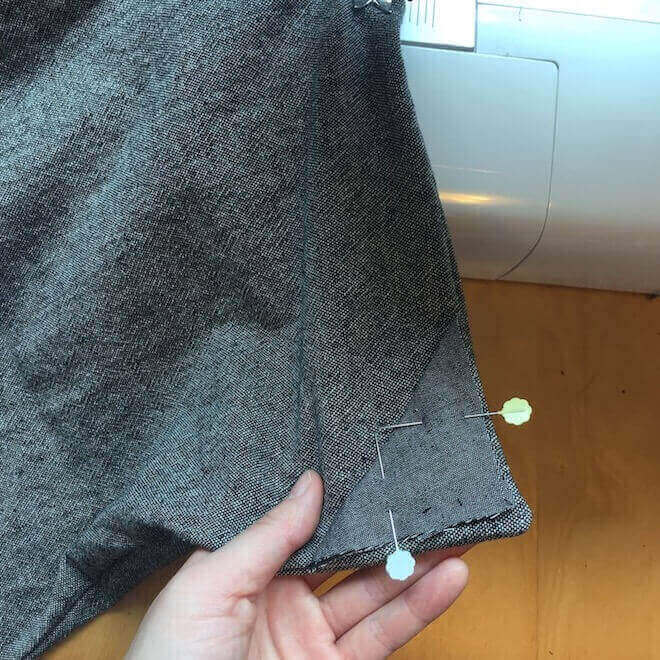
With a 1/2 inch seam allowance, sew from snip to snip along the side, bottom, and other side of your bag, sewing the triangles into the body of the bag as you go. As you sew, you’ll encase the raw edges from your first seam.
Trim the excess fabric along the perpendicular edges of the triangle

Now we’re going to create the casing for the drawstring.
Make the casing for the drawstring
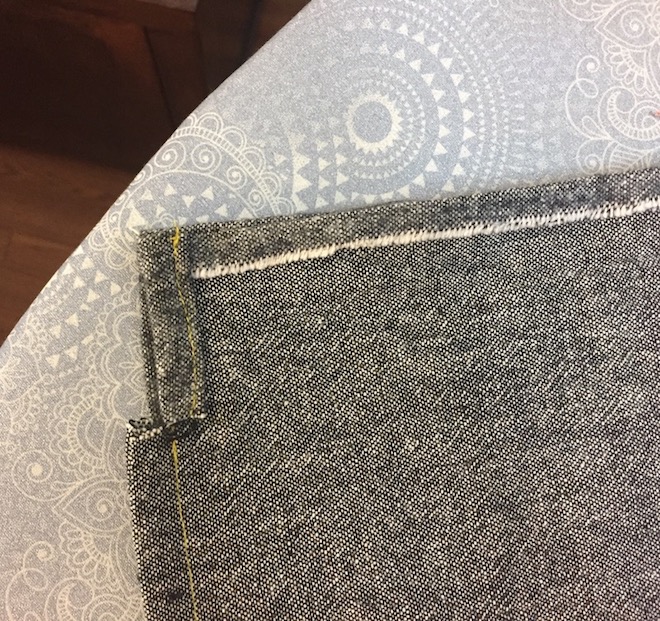
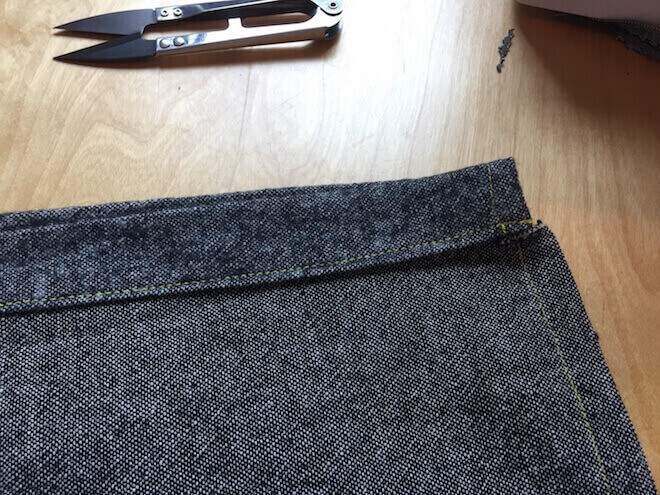
First let’s prepare the casing. With the bag still inside out, fold and press the top edge down 1/2 inch. Fold and press the side edges in 1/2 inch, then 1/2 inch again to create a hem.
Sew close to the edges of the side hems. Repeat to the opposite side.
Fold and press the drawstring casing in half, down toward the snip-line. It will measure around 1-inch. Stitch about 1/8 inch away from the edge of the casing, careful not to stitch both casings to each other.
Great. Now you can turn your bag inside out.

Next we’ll prepare the corners for the grommets.
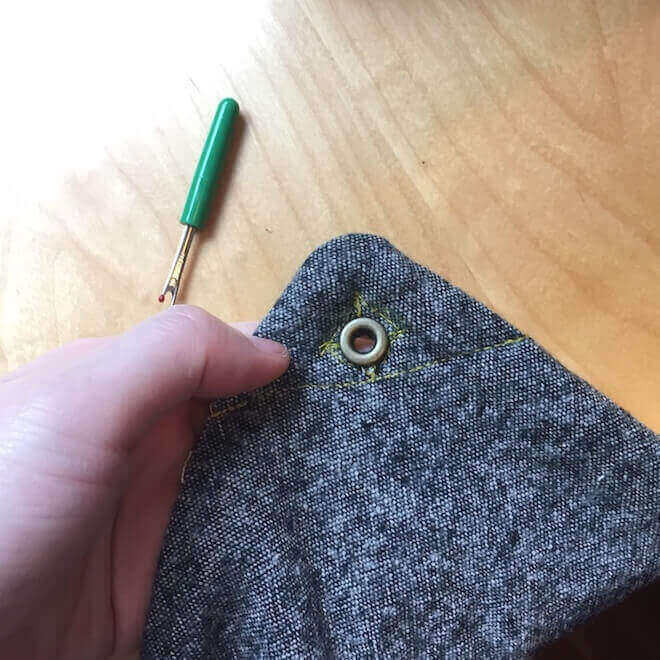
Punch in the grommets
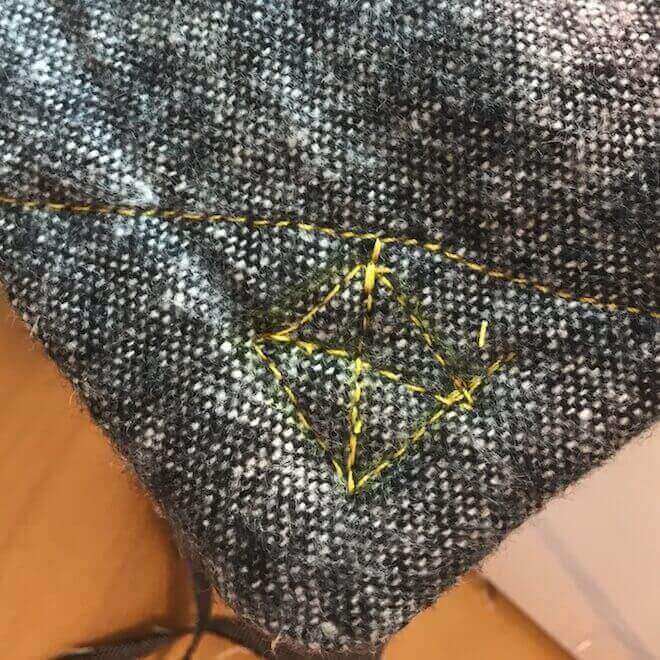
Before we punch in the grommets, let’s reinforce the corners a little more.
Sew very close to the hypotenuse of the triangles (which are now inside the bag). You’ll want to make sure the triangles are straightened out before you do this. I just used my fingers to feel where the hypotenuses were and sewed real close.
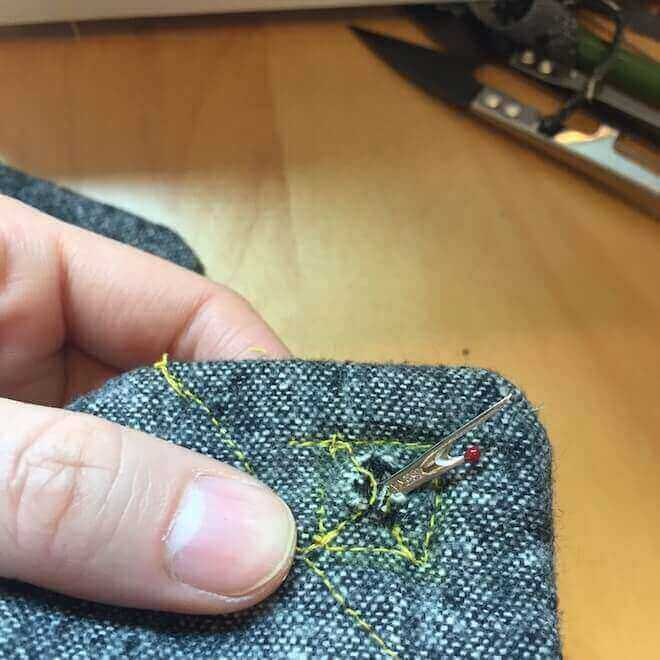
Next, using the grommet as a guide, use your pencil crayon to mark a square with an “x” in the middle to indicate the grommet placement.
Sew along the marks you just made.
Now you’ll want to make a hole in the middle of square for your grommet to fit through. There must be some kind of special punching tool for this, but I just used a seam ripper.
Using your hammer and grommet kit, punch the grommet into the hole you just created.
Now for the worst part of the process.
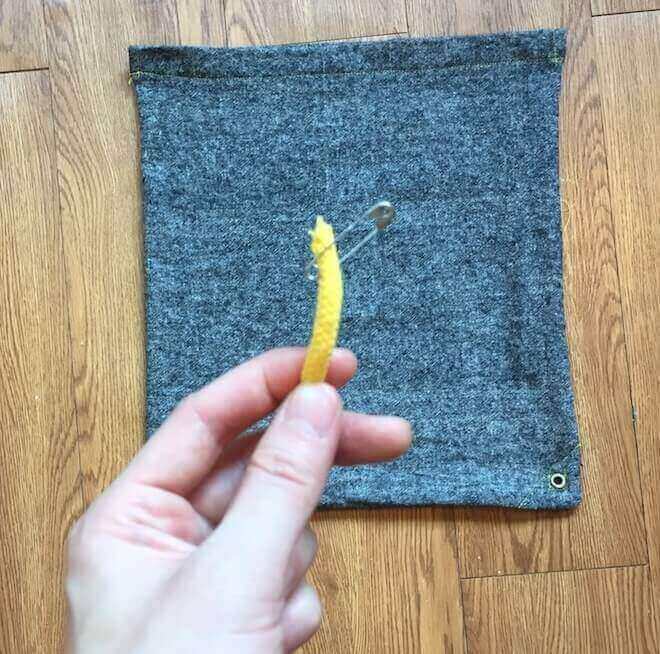
Insert the drawstrings
Worst part of the process, in my opinion. Reminds me of when you pull the string out of your hoodie and have to put it back.
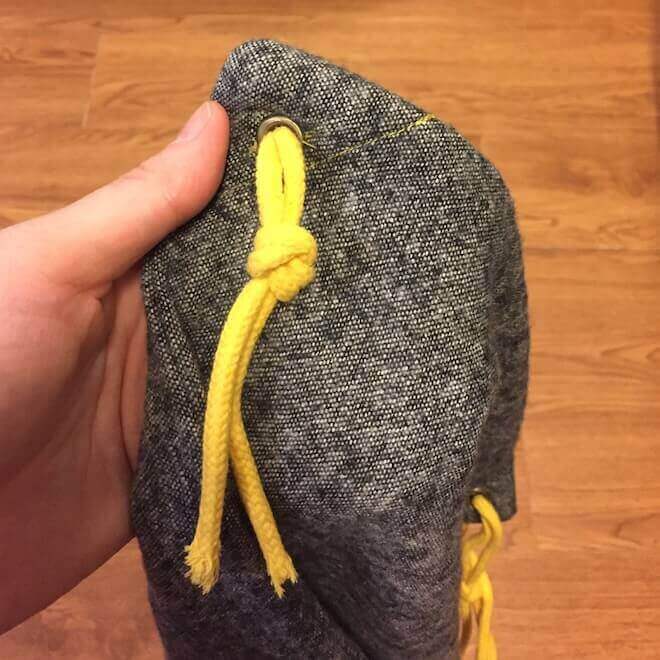
Attach a safety pin to one end of your cord and snake it through the drawstring casing.
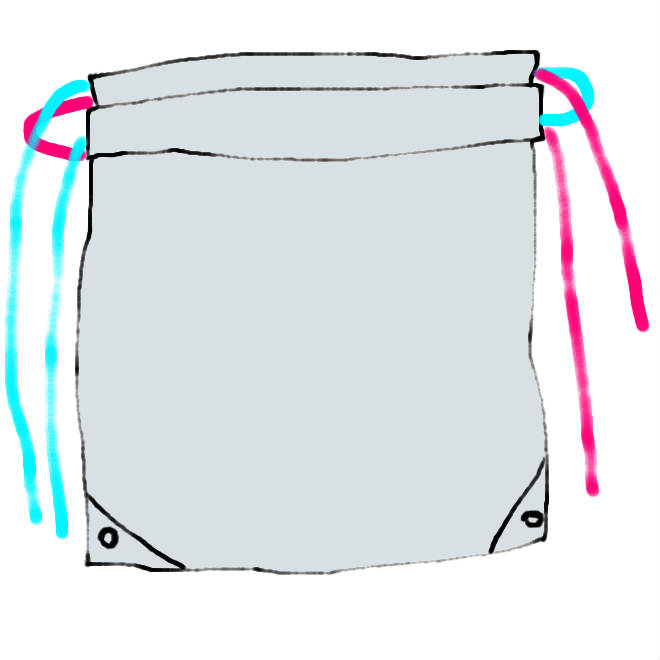
Use the diagram below if you’re confused about how the cords should be arranged.
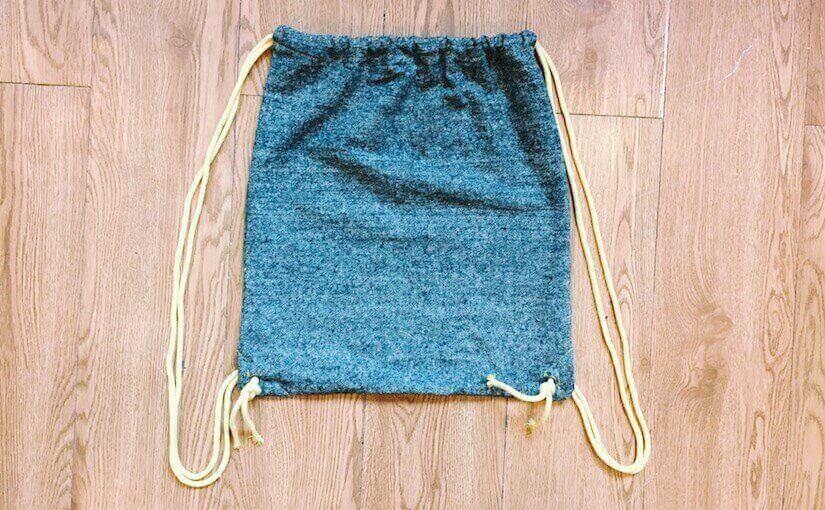
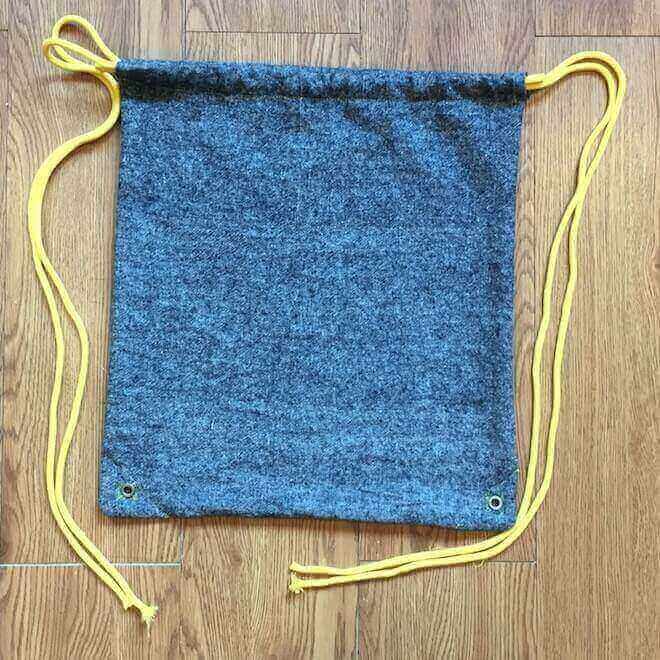
Your bag should now look something like this. Hooray!
Now you have two options. You can either (A) force both ends of each cord into the front of the grommets and tie them together (DIFFICULT), or (B) thread the front end of the cord into the front of the grommet and tie it with the back (EASY).
Here’s a picture of (A) both ends forced through the grommet and tied together at the back of the bag.
And here’s a picture of (B) the front end of the cord threaded through the front of the grommet and fastened to the other end at the back of the bag.

Cool, huh.

Try on the bag and adjust the knots as you please. Feel free to snip off the excess.
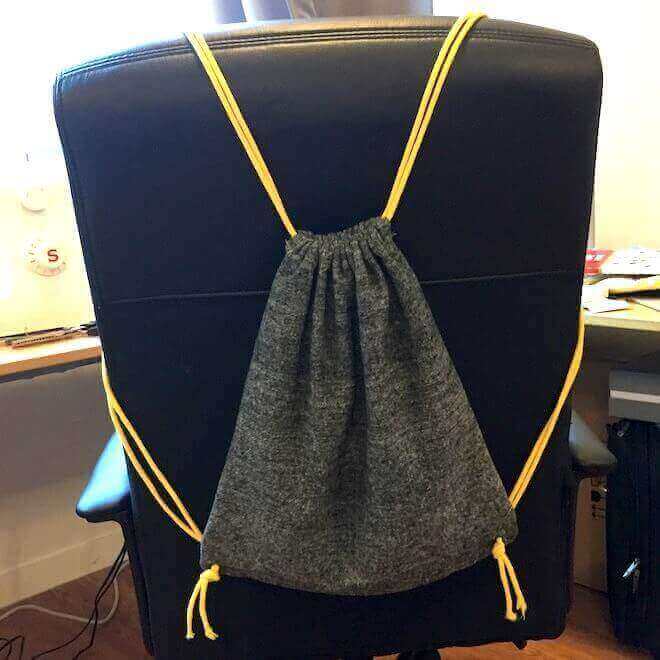
You’re done!
Comments? Questions? Leave a note in the comments!

Leave a reply! Feel free to leave a fake email address.